
Nobody likes the picture. The group shot where everyone else looks fine and you look like a hostage. The candid where your smile got stuck halfway. If you have ever said “I just do not photograph well,” this post is for you, and the first thing to know is that almost none of it is your face.
Most of how to look natural in photos is timing, light, and a few physical habits you can learn in an afternoon. The people who “always look good in pictures” are not better looking. They have figured out, usually by accident, how to stop bracing for the camera. None of what follows requires hiring anyone.
Why Do I Look Weird in Every Picture?
The honest answer is more useful than “you look great, stop it.” A few things are usually going on at once.
The smile was held too long. A real smile lasts a couple of seconds. By the time someone finds the button and takes three frames, your mouth is still smiling and your eyes have clocked out. That mismatch is what reads as fake. Nobody can hold a smile for twelve seconds.
You know the camera is there. The moment you become aware of being photographed, your shoulders rise, your neck shortens, and your weight settles evenly on both feet like you are about to be weighed. It is a body bracing for judgment.
You see yourself backward. Every mirror you have ever looked into shows you flipped. A photo shows you the way everyone else sees you, and because no face is perfectly symmetrical, that version looks subtly wrong to you alone. Your friends do not see it.
Your phone is lying to you. Phone cameras are wide-angle, and a wide lens has to be close to fill the frame with a face. Up close, whatever is nearest the lens gets bigger (the nose, the forehead) and the sides of the face fall away. Hold the phone at arm’s length, or have someone step back a few feet and use the 2x or 3x lens if the phone has one. Same face, and suddenly it looks like you.
The timing was off. Most bad photos are taken a half second after the real moment. The laugh has ended and what is left is the recovery face.
The light came from straight ahead. A flash on the camera, or a window directly behind the photographer, lights your face flat, with no shadow to give it shape. Turn forty-five degrees from the window, or step into open shade, and the same face gets its cheekbones back.
None of this is fixed by trying harder. It is fixed by changing what you do in the two seconds before the shutter.
Keep Moving Between Frames
Stillness is the enemy. A photo that looks natural is almost always a frame pulled out of motion: someone turning, settling, mid-sentence. Between frames, drop your shoulders, shift, turn slightly away and come back. Give the photographer a moving target and tell them to keep shooting.
Walking works for almost everyone. Walk toward the camera slowly, look down at your feet for a step, then look up. Three or four of those frames will beat anything you could stand still for.
Breathe Out, Then Look Back
Right before the picture, take a breath and let it all the way out. On the exhale your shoulders come down, your jaw unclenches, and your face stops holding itself. A lot of tense photos are taken mid-inhale.
Then try the look-away. Look at the ground or off to one side, and on a count of three, bring your eyes back to the lens. You arrive at the camera fresh instead of having stared at it for ten seconds. This one fixes more frozen faces than anything else.
The Fake Laugh That Turns Real
This sounds stupid. It works. Say “ha ha ha” out loud, as badly and as fake as you can. It is so ridiculous that within a second or two you are actually laughing. The frames right after the fake part are the ones you keep.
With other people, have someone say something absurd on purpose. The goal is not to be funny. It is to break the brace.
Give Your Hands a Job
Hands with nothing to do are the second most common tell after the frozen smile. The fix is to give them something: a pocket (thumb out so the hand does not disappear), a jacket over one shoulder, a coffee, a bag strap, the hand of the person next to you. Touching something lightly looks natural. Gripping it does not.
If you have nothing, fold your arms loosely, or put one hand in a pocket and let the other hang with a slight bend at the elbow. Try not to press both arms flat against your sides. It widens the body and reads as stiff.
Shift Your Weight to One Foot
Standing square to the camera with weight on both feet is how you stand for a driver’s license. Put your weight on your back foot, let the front knee bend a little, and turn your body slightly off center so one shoulder is nearer the camera than the other. You look like a person who was standing there before the camera showed up.
Leaning helps too. A wall, a fence, a car, a doorframe. Leaning moves the tension out of your body and into the thing you are leaning on.
Chin Forward and a Touch Down
This is the one that feels wrong and looks right. Push your chin toward the camera (as if you are reaching your forehead out), then tip it down slightly. It stretches the skin under the jaw and defines the line between your face and your neck. From the inside it feels like a turtle. From the camera it looks like a jawline.
Do not tilt your chin up to “look confident.” Up gives the camera your nostrils and shortens your face.
Where to Look When You Are Not Looking at the Lens
Looking off camera is the most natural-looking shot there is, and also the easiest to get wrong, because “look over there” produces a vacant stare. The fix is to look at something real: a specific point past the photographer’s shoulder, the person beside you, your own hands, the ground three feet in front of you. Your eyes focus on an actual thing and your face follows.
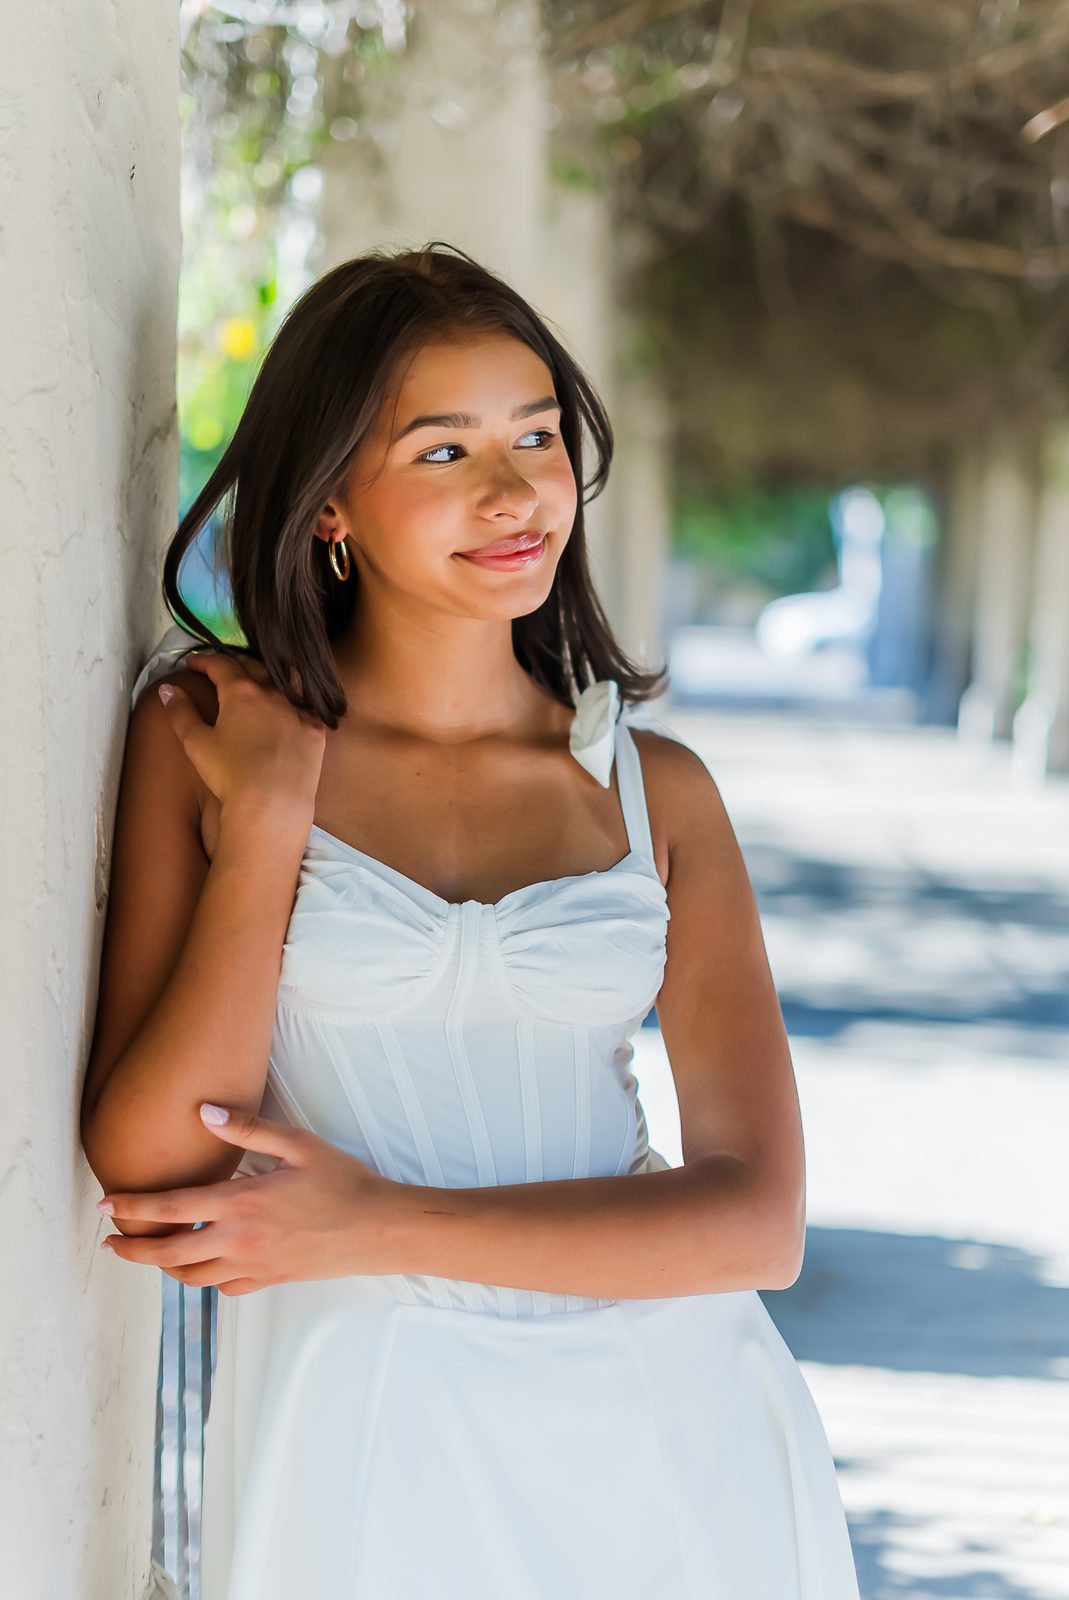
The header photo on this post is what that looks like: a senior leaning on a wall in soft shade, looking off to one side, half a second from laughing. You cannot get that face from “now gaze into the distance.” You get it when there is a real thing to look at and a real person to react to.
Best Poses If You Hate Being Photographed
The best pose for someone who hates posing is not a pose. It is an action with a beginning and an end: sit down on a step, lean back against the wall, fix a cuff, turn around when someone says your name. The camera catches you in the middle of something, which is what “natural” means.
If you need a default, here it is. Weight on the back foot. One hand occupied. Body turned slightly away from the camera, face turned slightly toward it. Breathe out. Look away, then back. That is the whole thing, and it works with a phone in a backyard or on location with a photographer.
How to Look Good in Photos Without Smiling
You do not have to smile. The trick is that the mouth has to be relaxed, not pressed. Let your lips rest together with no pressure, unclench your jaw, breathe out, and think about something specific (a person, a plan for later, what you are going to eat after this). Soft eyes with a neutral mouth reads as calm and confident. Pressed lips with wide eyes reads as a mugshot.
A half smile, where the corners of the mouth lift but the teeth stay hidden, is the safest expression there is for people who do not love their smile.
A Few Short Notes for Men, Women, and Anyone Over 60
For men: think fewer poses, more postures. Lean on something, put one hand in a pocket, walk, cross your arms loosely if it feels natural (not the bouncer version with the fists tucked). A serious expression works fine as long as the eyes are soft and the jaw is loose.
For women: the one thing to watch is the arm pressed against the body. Any arm resting flat against your torso looks wider than it is, so create a little air there: a hand on a hip, a bag strap, a hand on the person next to you. Angle your body rather than facing the camera square, and keep the weight on your back foot.
For anyone over 60: the chin-forward trick matters more, not less. Ask for light from the side and slightly above rather than from below or dead ahead. If you wear glasses, a small turn away from the light source or a slight tip of the frames down takes the glare off the lenses. And if standing for a long stretch is tiring, sit. Tension shows in a photo faster than anything else.
What to Tell Your Photographer
“I hate this” is useful information. Say it before the session starts. A good photographer hears that and changes the plan: more movement, more conversation, fewer “okay, now stand there” moments, and a faster first few minutes so you get past the awkward part early.
Also useful: which side you prefer, anything you are self-conscious about, and whether you want to see a frame early. None of this is high maintenance.
What a Good Photographer Does to Help
A good one talks constantly. Not instructions, just talk, so you are answering a question instead of thinking about your face. They shoot through the awkward part rather than waiting for you to get comfortable, because the first frames are warmups and nobody has to see them. And they show you a frame early, because the moment you see one good photo of yourself, the whole brace lets go.
It is also why our senior sessions run long: about two hours, two looks, on location wherever the family wants rather than in a studio, and $700 flat with the outfit changes and the full gallery included. That is enough time to forget the camera is there. The details are on the senior portraits page.
How to Feel Confident in Photos
Confidence in a photo is not a feeling you summon. It is the side effect of having something to do, something to lean on, and no time to think. Wear something you have already worn and liked. Do not try a new haircut the week before. Bring a person who makes you laugh. Then breathe out, look away, look back, and let whoever is holding the camera keep shooting.
If you would rather hand all of this to someone who does it for a living, tell us what you have in mind and we will tell you how a session would go.